Welcome to the
! Please enjoy our special offers for you

Samsung washing machine is leaking

Water leaks from the washing machine are almost always related to controllable circumstances that are easily remedied. To figure out what is causing this, try the following steps.
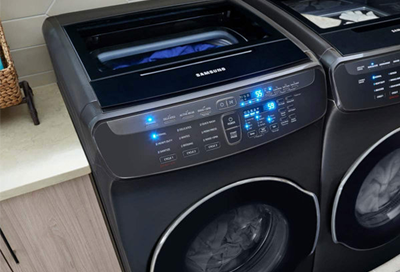
A water spill is visible next to a Samsung washer, illustrating potential leaking issues with the appliance

Samsung washing machine is leaking

Checkpoint

Check the washing machine's water supply and door seal for leaks
Important
On front loading washers, some water may drip from the door once it has been opened. This is normal; it's only considered a leak if it drips when the door is closed.
1

Inspect the hoses and connections.

Inspect every hose and its connections (on both ends) for damage. This includes the rubber on the hose, the o-rings inside the ends of the hoses, and anything the hoses connect to. Damaged hoses and o-rings should be replaced. If the washer is damaged, visit our Support Center to request service.


Graphical representation of the back of a Samsung washer, emphasizing the hose and hardware used to connect it to the water entry point.

2

Check the rubber gasket (on front load models).

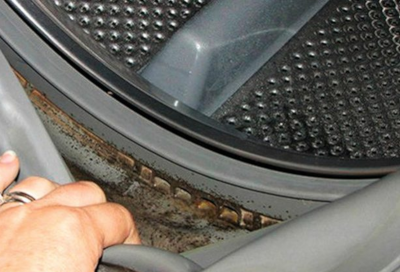
Inspect the door seal and carefully fold it back to look for any foreign materials or damage. Even something small can cause a leak, such as a single strand of hair or a piece of thread.


Additionally, make sure the door is fully closed and there aren't any objects blocking it.

3

Request service for a damaged door seal.

If the seal is damaged, visit our Support Center to request service.
Did this resolve your issue?
If this didn’t resolve your issue, please click on “No” for more help.
Yes No
We’re happy to hear that your problem has been resolved.
Make sure the washing machine's drain hose is installed correctly
Important
Issues caused by an incorrectly installed drain hose are not always experienced immediately after installation but can still be resolved quickly and easily by fixing the errors.
1

Check that it's inserted between 6-8 inches.

The drain hose must be inserted into the drain pipe at least 6 inches, and no more than 8 inches. Use the hose guide included with the washer to help, and then once the drain hose is in place, secure it with a zip tie so it will not slip down farther.


If the drain hose is more than 8 inches deep, it creates a siphoning effect which will cause issues with the washer. If the drain hose is inserted less than 6 inches, it may fall out which will cause water to spill all over the floor.


Graphical representation of the drain hose of a Samsung washer, accompanied by additional instructions for verifying its correct installation

2

Make sure the drain hose does not form an airtight connection.

An airtight connection creates a vacuum or suction effect that also causes siphoning.
3

Measure and confirm the height of the drain hose.

Most homes will already have the correct measurements, but it is good to check anyway to be sure. The drain hose should be positioned at least 18 inches high and no more than 96 inches high. You should not use a drain hose extension kit.


These requirements are different if a sink is being used. The drain hose should be positioned at least 24 inches high for sinks and no higher than 35 inches.

4

Inspect the drain hose for damage, kinks, or bends.

The hose should run smoothly from the washer to the home's drainage system. Bent or pinched hoses can cause leaks or draining issues.


If the drain hose is damaged, request service.

Caution
Do not remove the screw on the back of the washer that holds the drain hose against the washer. If the screw has been removed, screw it and the holder back in with any screw that fits. If the holder is missing, service is required.
5

Confirm the drain hose holder is installed.

It may be tempting to unscrew this clamp holding the drain hose to the back of the washer, especially if the drain hose doesn't quite reach as far as you want it to. However, removing this may cause the washer to drain automatically and give an LC or 4C error code.


Back view of a Samsung washer, emphasizing the highlighted clamp securing the drain hose

Did this resolve your issue?
If this didn’t resolve your issue, please click on “No” for more help.
Yes No
We’re happy to hear that your problem has been resolved.
Clean the washing machine pump filter
1

Locate and open the pump filter.

Most front load models have an accessible pump filter (also called a debris filter) on the front of the unit, near the bottom. This pump filter requires routine maintenance to be kept clean. The recommended interval is at least once a month, or every 40 washes, whichever is more frequent.


If cleaned often, it will never get clogged, and your washer will stay in good condition. If neglected, it can clog and cause issues with draining and even leaks.


To begin, open the pump filter door panel by pressing on the cover.


Close-up of the cover concealing the pump filter of a Samsung washer

2

Prepare to drain the water.

Locate the rubber drain hose and prepare to drain the water. You will need a towel and a container large enough for the amount of water in the washer, like an oil drain pan.
3

Remove the cap and drain the water.

Remove the cap from the drain hose by holding the hose and twisting the cap. The cap can be tough to remove because it forms an airtight seal, so make sure to use a little elbow grease. Once the cap is removed, drain the water.


Graphical representation of water being drained from a Samsung washer, flowing into a bowl through the hose

4

Fully remove the pump filter.

Once all the water is drained, remove the washer pump filter by twisting it counter-clockwise.


On some Samsung washers, the washer pump filter (A) is similar to the cap on a medicine bottle. Push in and twist it to remove the cap.


Graphical representation of the pump filter being removed from a Samsung washer

5

Clean the pump filter.

Using a small toothbrush or other similar soft bristle brush, wash any dirt or other materials from the pump filter. Inspect the drain pump impeller (located inside the pump filter housing) to make sure it is clean.


Graphical representation of a pump filter from a Samsung washer being washed over a sink with a small soft brush

6

Reinsert the pump filter.

Once the pump filter is clean, reinsert it and twist it clockwise until it's secured in the vertical position.
7

Reattach the drain hose.

Place the drain hose's cap firmly back onto the drain hose and secure the drain hose in the mounted clip before closing the panel.
Did this resolve your issue?
If this didn’t resolve your issue, please click on “No” for more help.
Yes No
We’re happy to hear that your problem has been resolved.
Use the right amount of HE detergent, and remove residue from the washing machine
Important
If there is a leak directly from the detergent drawer, use less detergent (and confirm it is HE detergent), make sure the drawer cover is sealed (if it has one) and that the drawer is clean. Then, run a cycle. If the leak continues, visit our Support Center to request service.
1

Check for and remove soap scum buildup.

Using too much detergent or non-HE detergent (even once) can result in excessive suds, causing detergent residue that contributes to multiple performance issues, including leaks or leak errors. If there's a chance that any cycle was run with excess or non-HE detergent, you should check for and remove the detergent residue.


Run an empty cycle and do not add detergent or any other additives. If suds appear in the wash, it is coming from the detergent residue, and you should continue to run empty cycles until suds no longer appear.

2

Use the correct amount of HE detergent.

Use trial and error to find the least amount of detergent that achieves the best cleaning results, and do not exceed either of these two recommendations:


  • The MAX line in the detergent drawer.
  • The maximum recommended by your detergent's manufacturer for the load size you're washing.


If either of these are exceeded, it will result in soap scum buildup in your washer. Using the minimum amount of detergent you need to get your clothes clean also helps prevent this buildup.


  • If you're using liquid detergent, make sure the Liquid Detergent Tray (A) is in the drawer.


Graphical representation of the detergent tray of a Samsung washer, highlighting the maximum amount of liquid detergent recommended for use


  • If you're using powdered detergent (B), make sure the Liquid Detergent Tray is removed.


Graphical representation of the detergent tray of a Samsung washer, illustrating the proper method for using powdered detergent

3

Confirm the detergent drawer is completely assembled.

Some detergent drawers, such as auto dispenser models, include a cover on the detergent drawer. If this is not completely sealed into place, it can lead to leaks. Additionally, ensure the detergent drawer is fully closed.
4

Ensure the washer isn't overloaded or too full.

Do not pack the washer with clothing until it is overloaded or too full.
Did this resolve your issue?
If this didn’t resolve your issue, please click on “No” for more help.
Yes No
We’re happy to hear that your problem has been resolved.
Make sure the washing machine is level
Note
When using a pedestal or riser, it should be leveled first before the washer is installed on top. Some vibration is expected when using a pedestal or riser, even if the washer is properly leveled. Soft surfaces such as carpeting will also cause some vibration.
1

Check the floor and surrounding space.

Before you begin the process of leveling, make sure to have one inch of separation between the washer and dryer and from any wall.


You'll also want to make sure the floor is stable and free from damage. A slippery floor can disturb the balance of the washing machine.

2

Gently slide the washer into position.

Excessive force may damage the leveling feet.
3

Try to rock and wobble the washer.

The washer should have a solid and firm connection at all four corners. If one corner wobbles, first shorten the legs of all the other corners. If they're already as short as they can be, then the wobbly corner's leg should be lengthened.


Graphical representation of Samsung washers, showcasing the highlighted four corners of each appliance

4

Release the locking nuts (front load models only).

Use a flat blade screwdriver to loosen the locking nut of the legs you'll be adjusting.


Graphical representation of a flat blade screwdriver being used to loosen the locking nut of the legs of a Samsung washer

Note
All front load washers have four adjustable legs. Some top load washers do too, while other top load models only have two or three adjustable legs, in which case the remaining legs are not adjustable.
6

Tighten the locking nuts (front load models only).

Just like before, use a flat blade screwdriver to tighten the locking nuts up against the washer.


Graphical representation of a flat blade screwdriver being used to tighten the lo nut of the legs of a Samsung washer

7

Run a test cycle.

Run the washer with a small load of laundry to determine that it does not shake or vibrate. If it does, continue to adjust the legs until it does not.
Did this resolve your issue?
If this didn’t resolve your issue, please click on “No” for more help.
Yes No
We’re happy to hear that your problem has been resolved.
Check for leaks with a test cycle
1

Follow the troubleshooting steps in the video.

Please follow the steps in the video before moving on to Step 2.
2

Determine if you need to run a test cycle.

If none of the troubleshooting steps in the video resolved your leak issue, visit our Support Center to request service.


However, if you encountered any of the problems in the list below, then it's worth the time to run a test cycle (like Rinse & Spin) to see if the leak continues.


  • Found and corrected an issue with the hoses, connections, or door gasket
  • Had soap scum that needed to be cleaned out
  • Discovered your drain hose was not installed correctly and fixed it
  • Had a very dirty pump filter that is now clean (front load models only)
  • Needed to level the washer because it wasn't level
3

Request service.

If the leak continues, visit our Support Center to request service.
Did this resolve your issue?
If this didn’t resolve your issue, please click on “No” for more help.
Yes No
We’re happy to hear that your problem has been resolved.
Was this content helpful?
We're here for you

Contact Samsung Support

Contact us online through chat and get support from an expert on your computer, mobile device or tablet. Support is also available on your mobile device through the Samsung Members App.
auto-contact_us-pc-2x auto-contact_us-pc-2x
Fast, easy checkout with Shop Samsung App
Easy sign-in, Samsung Pay, notifications, and more!
Or continue shopping on Samsung.com
×
The Shop Samsung app
Free standard shipping, exclusive offers and financing options.
GET
×
The Shop Samsung app
Free standard shipping, exclusive offers and financing options.
GET
×

You Are About To Be Redirected To Investor Relations Information for U.S.

Thank you for visiting Samsung U.S. Investor Relations. You will be redirected via a new browser window to the Samsung Global website for U.S. investor relations information.
CANCEL
CONTINUE
×

Redirect Notification

As of Nov. 1, 2017, the Samsung Electronics Co., Ltd. printer business and its related affiliates were transferred to HP Inc.

For more information, please visit HP's website: http://www.hp.com/go/samsung


Select CONTINUE to visit HP's website.

CANCEL
CONTINUE